Gradation is a technique where colors gradually transition from one color to another, and as I encounter fixing color cards (or blocks, or anything!) from lightest to darkest, I begin to realize how hard it can really be sometimes – especially when the colors are too close to each other.
This is one of the basic skills Montessorians heavily support – from the Gobbi mobile to the color tablets, and homemade activities like this one.
My son is very familiar with colors already, so I decided to do a quick DIY of this in case he shows some form of readiness.
Usually, color activities would involve differentiating one color from another (like puzzles where you match colors), but with color gradation matching work, children also begin to see that one color can have a plethora of shades.
Today, I’ll show you how you can do this type of work with materials you already have at home.

MATERIALS NEEDED:
- 2 sets for each color of paint sample cards (In the Philippines, I do not know of any hardware/ paint store that allows you take these home, so you can either ask for your relatives coming home from the US to grab some for you – they’re free!, OR, you can simply print on paper. You can google: pantone + (color) for the gradations.
- Wooden Blocks (from my son’s unit blocks – unit blocks sets always come with cubes)
- Washi tape
- Scissors
INSTRUCTION:
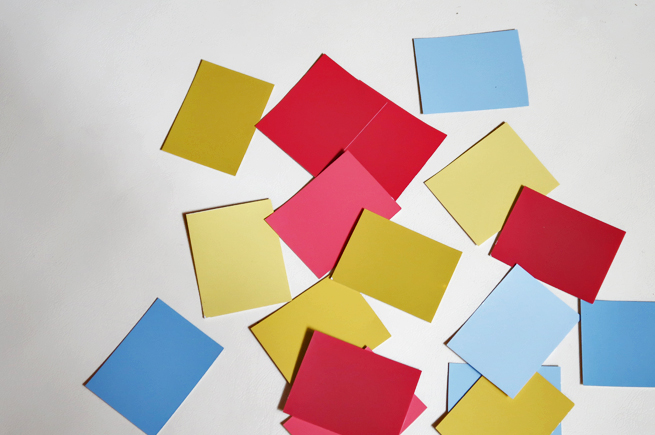
Step 1: Cut the cards into rectangular shapes (same size for all). There must be 2 pieces for each color (one to be taped on the block, and one as the matching card).

Step 2: Cut the colors for the block into squares so you can tape it directly on the block. You can reinforce this by using a glue gun (especially because your toddler will most likely just take the tape off), but if you’re not sure yet if you want to keep it permanent (my situation now), just use a washi tape so you can take it off without leaving any residue on the surface.

Step 3: Put them on a tray with dividers and offer it to your child. Observe if your child is ready and can already make the distinctions. If not, you can either downgrade to (2) shades first: the lightest and the darkest for easier distinction, or if it still doesn’t work, keep it in your closet for future use.
TIPS:
1) Since I used paint sample cards (3 shades per color), the colors are very close to each other. So, I ended up using 2 colors from the same sample card, and looked for another card with either a lot darker shade, or a lot lighter shade for easier distinction.
2) When my son is already very used to the high contrast, I can move on to more similar shades.
3) If you’re planning to do something permanent and free from being taken off by your child (like taped papers), I highly recommend working with non-toxic paint. You can start with the darkest color (you can mix black if the available color is too light for your purpose), then add white as you go to make the shade lighter. If you’ll do this though, you might want to work on 7 or 8 shades per color already, as your child will surely graduate for just 3 shades.
Hope you have fun doing this! Let me know if it worked for you.:)